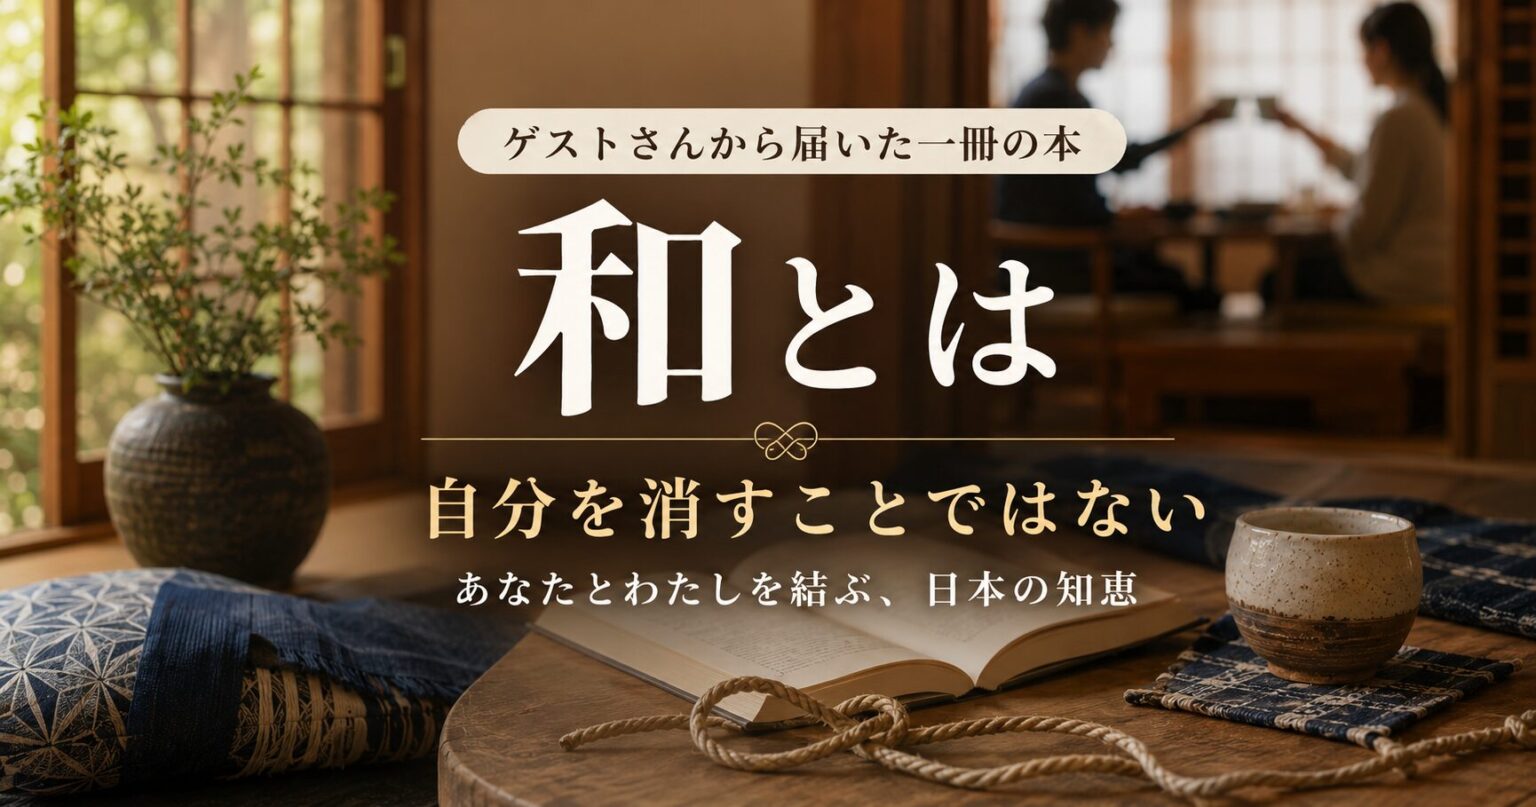
Mt. Haguro is one of those places where you can point your camera in almost any direction and get something worth keeping.
But knowing where to stand, when to visit, and what to look for turns good photos into extraordinary ones. The 2,446-step cedar forest staircase, the National Treasure pagoda, the sacred bridge, the mountain tea house, the grand summit shrine — each has angles and conditions that bring out its best.
In this guide, I'll walk you through every significant photo location at Haguro, the best time of day and season for each, and specific tips for getting the most out of your camera — whether you're shooting on a smartphone or a dedicated camera. 😊
→ Haguro top 10 highlights [Article No.5]
→ Stone staircase complete guide [Article No.12]
The Photo Spots — Complete Guide
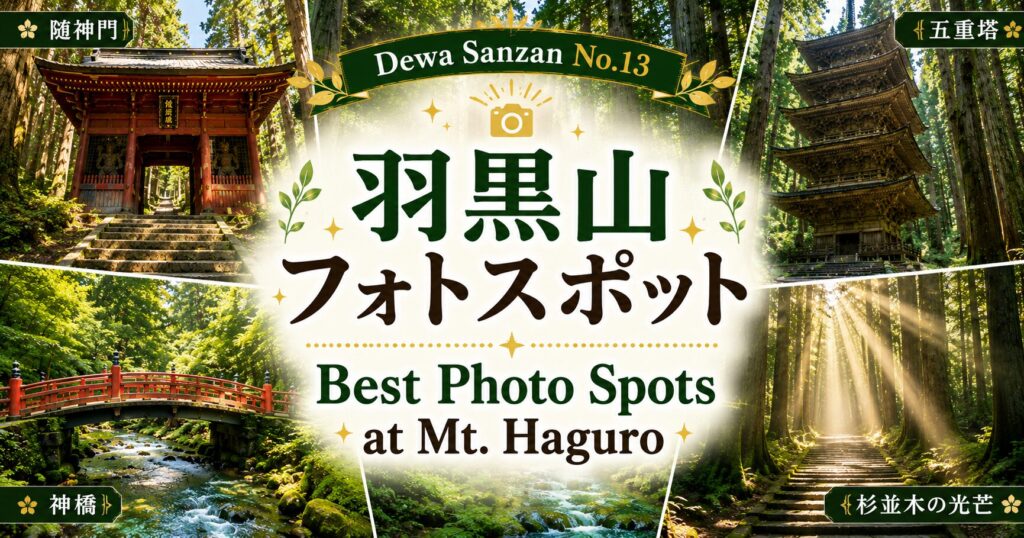
📸 1. Zuishinmon Gate — The Threshold Shot
The Zuishinmon Gate, where the stone staircase begins, offers one of the most compositionally reliable shots at Haguro: the vermillion gate framed by ancient cedar trunks, with the stone staircase disappearing into the forest beyond.
Shot from outside the gate, looking through to the path beyond, the image gives a sense of entering another world. Shot from inside, looking back out, you see the contrast between the forest's darkness and the light of the ordinary world outside. Both are worth taking.
Best angle: Centred in the gate, shooting along the staircase into the forest. Or from outside, using the gate frame as a compositional border.
Best time: Early morning (empty, mist possible) or late afternoon (warm light on the gate).
💡 On misty mornings, the cedar trees beyond the gate disappear into white, leaving just the gate itself and the first few stone steps. This is one of the most atmospheric shots possible at Haguro.
📸 2. The Sacred Bridge Over Haraigawa Stream
A short way into the first slope, the path crosses Haraigawa via a red wooden bridge. The combination of the vermillion bridge, the green moss-covered stones, and the clear stream below makes this one of the most consistently beautiful spots on the mountain.
From the side, the bridge reads as a strong horizontal element across the frame, with the stream leading the eye into the image. From the bridge itself, looking down into the stream, the clarity of the water and the patterns of light on the stones are worth capturing.
Best angle: From the bank, shooting the bridge side-on with the stream leading into the frame. Or from the bridge, shooting straight down into the clear water.
Best time: Morning (light on the water, no harsh shadows). Spring (fresh green) and autumn (fallen leaves on the water surface) are standout seasons.
💡 In autumn, maple leaves collect in the stream and on the bridge steps. The combination of red maple, red bridge, and clear water is one of Haguro's most striking seasonal compositions.
📸 3. The Cedar Forest Staircase — Scale and Atmosphere
The cedar forest is the defining visual experience of Haguro — and also its most photographically challenging subject. How do you capture in a two-dimensional frame something that works because of its three-dimensional scale and atmosphere?
The most effective approaches: shoot along the staircase from a low position, so the steps recede into the distance with cedar trunks on both sides (depth, symmetry, scale). Or find a section where the cedar trunks form a natural frame, and let the path disappear into it. Or point the camera straight up at the canopy — the trunks converging toward the sky reads as powerful even in a still image.
Best angle: Low on the steps, shooting along the staircase. Or directly upward from between the trunks.
Best time: Early morning light (7–9 AM), when shafts of light break through the canopy. Or on overcast days, when the diffused light gives the forest an even, otherworldly quality.
💡 The cedar forest photographs very differently in different seasons. In May–June, the green is luminously fresh. In September, cool clear light gives definition. In winter (with snow on the branches), the forest turns silver-white. Each season gives a genuinely different image.
📸 4. The Five-Storied Pagoda — Framing the National Treasure
The pagoda is the most photographically famous subject at Haguro, and the one that requires the most thought to shoot well.
The challenge: the surrounding cedar trees are so large and so close to the pagoda that standard straight-on shots are obstructed. The solution that works consistently is to use the cedar trunks as a natural frame — position yourself so that two or three trunks bracket the pagoda in the background, creating a sense of discovery rather than presentation.
Look for the spots where you can see all five storeys clearly between the trees. These positions are not immediately obvious — take 5 minutes to explore around the pagoda perimeter before committing to your shooting position.
Best angle: Cedars-as-frame. Find gaps in the trees that let the full pagoda height show. Shoot from lower down to emphasise the pagoda's height.
Best time: Morning (light on the pagoda face). Mist and rain change the character completely — the upper storeys disappear into grey, which can be more evocative than full visibility.
💡 The pagoda appears suddenly from around a bend in the staircase — this is a discovery moment, not a viewed exhibit. The first impulse is to immediately photograph it from where you're standing. Resist. Move around it first. The best shot is rarely the first one you see.
→ The mystery and history of the pagoda [Article No.21, No.23]
📸 5. Ninosaka Chaya Tea House — Mountain Life in Frame
The Ninosaka Chaya tea house, halfway up the second slope, is one of those locations that photographs almost itself. A weathered wooden structure among 400-year-old cedar trees, with a veranda looking out over the forest — it has strong visual character regardless of conditions.
The tea house photographs best with people in it. A traveller sitting on the veranda with a bowl of mochi, looking into the forest — this creates a sense of scale, humanity, and atmosphere that an empty-building shot doesn't achieve. If you're travelling with someone, have them sit while you shoot from slightly outside.
Best angle: Slightly below the veranda, shooting up toward the tea house roof and the cedar canopy behind it. Include the sitting area.
Best time: Any morning. Autumn foliage behind the tea house is exceptional.
💡 The chikara mochi (strength rice cakes) served here photograph well too — a small bowl of traditional sweets against the cedar-wood table, with forest light in the background. A good detail shot for any Haguro photo series.
📸 6. The Cedar Light Shafts — Dawn Exclusives
The most sought-after shot at Mt. Haguro — and the one that requires the most planning to capture — is the light shaft phenomenon that occurs in the cedar forest in early morning.
When conditions align (early morning light at a low angle, slight moisture in the air, the right forest density), the sun's rays break through the cedar canopy in distinct shafts — narrow columns of gold that fall between the dark trunks onto the stone steps below. The effect lasts 20–40 minutes at most, and only under specific conditions.
What makes this extraordinary photographically is the contrast: the forest is otherwise dim and green, and these shafts of warm light are intensely focused. They feel like something placed there intentionally.
Required conditions: Arrival before 7 AM. Slightly hazy or humid air. The section from the first slope to mid-second slope is the prime location.
Equipment tip: A wide-angle lens emphasises the scale of the forest and the light shafts simultaneously. On a smartphone, portrait mode off, let the scene expose naturally.
💡 This effect cannot be guaranteed — it requires the right atmospheric conditions. Plan for the early morning experience itself (the empty staircase, the dawn quality of light), and treat the light shafts as a possible bonus. That approach produces better photos and a better experience.
→ Early morning at Haguro: full experience report [Article No.29]
📸 7. Sanjin Gosaiden Summit Shrine — Scale and Ceremony
The Sanjin Gosaiden at the summit is a large, complex building — and photographing it well requires some spatial planning.
The thatched roof is the defining visual element. It's most clearly readable from a position slightly back from the shrine entrance, where all three layers of the roof can be seen simultaneously. Shooting from directly in front, at ground level, typically produces a distorted perspective.
For a different approach: shoot the incense smoke rising from the main burner against the thatched roof background. Or capture the detail of the rope and paper decorations (shimenawa and shide) that mark the sacred entrance. These details convey the shrine's spiritual character more directly than wide-angle architecture shots.
Best angle: From the main precinct, slightly back from centre. Or detail shots of the decorative elements at the entrance.
Best time: Morning (light on the shrine face). Winter with snow accumulation on the thatched roof is exceptional — and rarely photographed.
💡 If other visitors are present, include them in the frame. A person standing before the Sanjin Gosaiden gives the scale of the building in a way that no object-only shot can achieve.
→ About the Sanjin Gosaiden [Article No.17]
📸 8. The Bell Tower — Silence Made Visible
The Bell Tower (Shoro) in the summit precinct is one of the less-photographed elements of Haguro — and one of the most atmospheric.
A large bronze bell hanging in a dark wooden frame, surrounded by ancient cedar trees. The combination of the bronze, the dark wood, and the forest behind creates a naturally moody image, especially in overcast conditions or in morning shadow.
Best angle: Low, looking up at the bell and the roof of the tower. Include one or two cedar trunks in the background.
Best time: Overcast or misty conditions — the absence of harsh shadow suits this subject well.
💡 If you're there during morning rituals, the bell is rung — the moment of the bell swinging is a compelling action shot if you're positioned and ready.
Photo Planning: Season and Time Summary
| Season/Time | Visual Character | Best Spots |
|---|---|---|
| Spring (Apr–May) | Fresh green, occasional mist, cool light | Cedar forest, sacred bridge, pagoda |
| Early summer (Jun–Jul) | Deepest green, light shafts frequent in morning | Full staircase, early morning only |
| Summer (Aug) | Strong contrast between shade and light | Pagoda (morning), summit shrine |
| Autumn (Sep–Oct) | Red and gold against deep cedar green, clear air | Sacred bridge, tea house, cedar forest |
| Winter (Nov–Mar) | Snow, silver-white, very few visitors | Zuishinmon Gate, summit shrine (snow on roof) |
| Early morning (before 7 AM) | Empty staircase, possible light shafts, mist | Entire staircase, cedar forest |
| Late afternoon (after 3 PM) | Warm oblique light, long shadows | Zuishinmon Gate, staircase depth shots |
Technical Tips — Smartphone and Camera
Smartphone Shooting
Modern smartphones handle the contrast between Haguro's dark forest and bright highlights surprisingly well. For the cedar forest, let the automatic exposure work — don't override it toward the bright sky or the dark trunks.
Portrait mode (or 'live focus') works well for shots where you want the staircase sharp and the trees softly blurred. For architecture (pagoda, gate, shrine), switch off portrait mode and shoot in standard photo mode.
Use the grid overlay to keep horizons straight on the sacred bridge shots
Tap to set focus on your main subject before shooting — the auto-focus sometimes chooses the wrong element in a complex forest scene
For light shaft shots: tap on the dark area of the frame (the forest floor), not the bright shafts — this prevents overexposure of the effect you're trying to capture
Tripods and Phone Stands
In the low light of early morning or late afternoon, handheld shots blur easily. A compact tripod — or even a small phone stand — is the difference between a soft frame and a sharp one.
It matters most for the light shafts, where the shutter has to slow down. With the camera held steady you can keep the ISO low, the image clean, and simply wait for the light to arrive.
Vertical or Horizontal?
Shoot the cedar staircase and the pagoda vertically and you feel their height — the frame climbs with them. Go horizontal for the sweep of the forest or the river. One quiet habit lifts almost every shot: take both, decide later.
Dedicated Camera
Wide angle (16–24mm equivalent) for the cedar forest staircase — captures scale
50–85mm for the pagoda and shrine — less distortion, more natural proportions
For light shafts: use a small aperture (f/8–f/11) to make the shafts more defined; a tripod is needed at the resulting slow shutter speed
Spot metering on the brightest shaft of light prevents the whole image from overexposing
In the dark forest: ISO 800–1600 is often needed to maintain a workable shutter speed without a tripod
Final Thoughts
Mt. Haguro rewards patient photographers. The conditions that make the best shots — early morning mist, autumn foliage, winter snow, the cedar light shafts — are not always predictable or guaranteed. But the mountain is always photographically generous: even on an overcast midday visit, the texture of the ancient stone, the scale of the cedars, and the character of the shrine will give you images worth keeping.
Come with a charged battery, more storage than you think you need, and the willingness to move slowly and look carefully. The mountain will do the rest. 😊
→ Stone staircase complete guide [Article No.12]
→ Early morning visit experience [Article No.29]
→ Haguro top 10 highlights [Article No.5]
Guesthouse Watausagi sits right in the heart of Dewa Sanzan territory — perfectly positioned between Hagurosan, Gassan, and Yudonosan. Guests come from across Japan and around the world to explore these sacred mountains. Make Watausagi your base and discover the spiritual world of Dewa Sanzan! 😊
We also share the charms of our home region — Yamagata, Tsuruoka, and the Shonai area.
I'm always sharing updates and local tips on Instagram Stories. Follow us on Instagram and stay in the loop! 😊
Likes and shares make my day 💕
📖 やまがたいいとこ の関連記事
 What Is the Akagawa Fireworks “Otetsudai-tai”? How to Get Into a Viewing Area Without a Ticket
 Where to Stay for the Akagawa Fireworks: What to Do When Tsuruoka Is Booked Out
- STAY WITH US -
Your Base for Exploring Tsuruoka
A small guesthouse in central Tsuruoka, Yamagata. The perfect base for your trip to Dewa Sanzan and Shonai.
Book Now →